Hi friends!!
The last and final tutorial of the Epic Swan Cake is this beautiful altered book made of gumpaste!!

This was my FAVORITE part of the entire swan cake!!! If you want to know how I created ALL the details to this cake, check out the original post with links to all the tutorials HERE.
 Onto the book!! I can’t wait to make another one. I learned so much with this one and being that it was my first time, I’d do things a little differently next time. Let me explain…
The first thing I needed was inspiration. So, I went onto Pinterest and searched “Altered Books”. Oh there are some AMAZING books on there, but I needed something fairly simple. Here are the three books that inspired me the most for this project…

Now that I was inspired, I needed to create my own “scene” for my book. I started sketching and this is what I came up with…a combo of the books above.

Now, I cut out some cardstock paper the same size as my book pages, went over to the window, taped my drawing (above) to the window and laid my first piece of cardstock over it. I drew on that first paper my first layer…the outside tree trunks of the trees. I used a scalpel to cut out that design. Then grabbed another piece of cardstock, went back to the window and decided my second layer would be one hill on the bottom and the bushes at the top. After I cut this one out, I decided I wanted more hills. So, I grabbed some cardstock, cut a few hills out and taped it to my second cardstock template. The third would be the swans and the lake…that’s it. The fourth would be two trees, the fifth a tree and a few hills, the sixth another tree and the last one some tiny trees and the moon. Each time I went to draw on the next cardstock page over my original drawing on the window, I made sure to add my already cut layers on top of it so I knew where the other elements would be. There were a few times I wanted to move something, so I’d cut that element out of that page, move it a little and tape it back in place. I knew these would be my guides, so they didn’t need to be that pretty…here are two that I re-taped because I either added additional elements or wanted an element moved after the fact. I added a hill in the top one and moved the moon down in the bottom one.

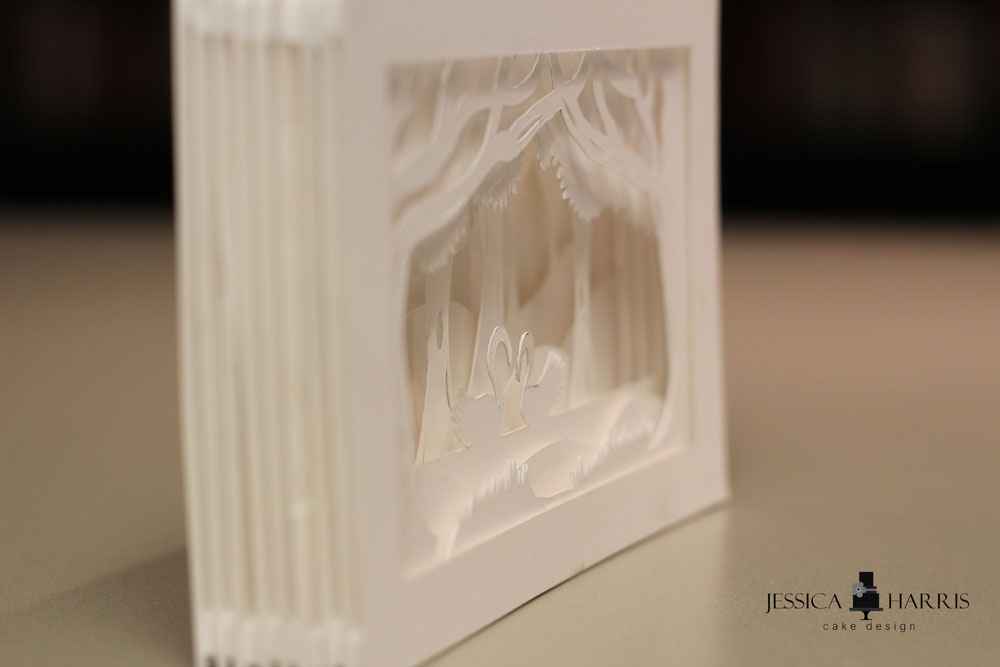
I continually placed the top ones back on and adjusted the elements on each page until I got it like I liked them. I decided to eliminate the house half way through because it got a little busy in there and I loved how the simple hills and trees ended up looking. Once I finished the pages like I wanted them, I glued in a few spacers to see what the thickness would be like and how it would look with the spacers on each page…

I LOVED it!!!!

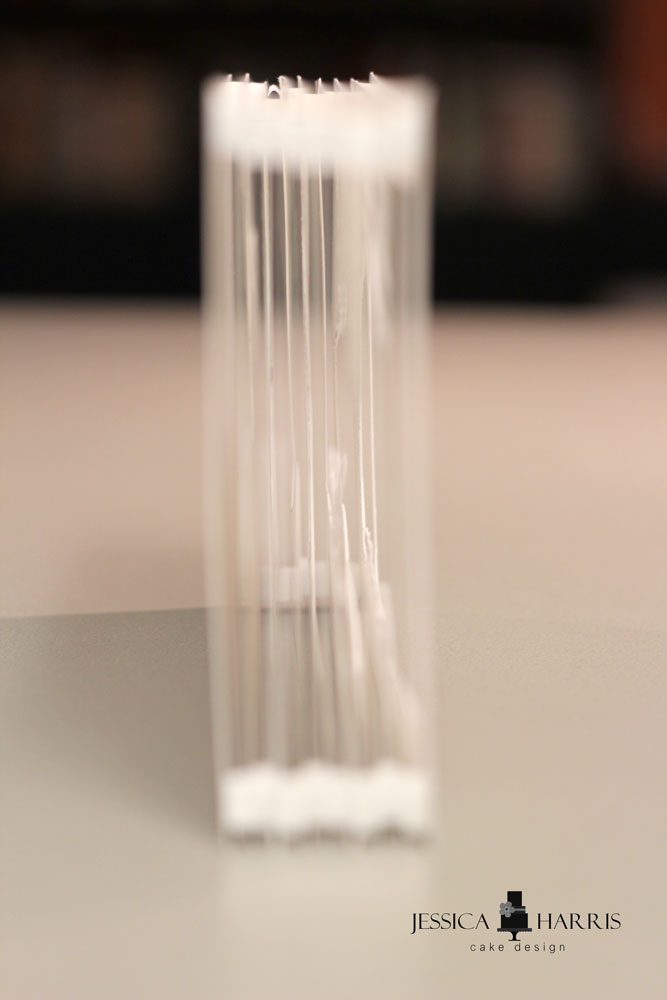
It ended up being pretty thick. I showed it to a friend and she said maybe to make the spacers a little smaller so it wouldn’t look like a shadow box, but more compact like a book. So, when I went to attach the real gumpaste book I kept that in mind.
Oh, I love these books!!
Now that I had all the page templates cut and ready, I had to decide what colors to use. I wanted to have various shades of gray like Helen’s book in the inspiration photos above. I loved that gray wintery scene and felt it looked like Christmas. So, I colored my gumpaste and rolled it REAL thin…a #4 on the pasta machine. I cut each one to the approximate size each page would be and let them sit out. When I took this picture below, I had already done the white ones as my guinea pigs! I cut extra of each color in case I messed them up!!

I didn’t know how long I’d need them to sit before I could cut them and not have them stretch, but also so that they wouldn’t get too hard and I could still get a clean cut. So I used one panel and every hour I would cut a little on it to see how it was. It took about 6 hours before I felt they were ready to be cut and still hold their shape, but be soft enough to cut. Your climate and medium will be different, so don’t hold me to the 6 hours. Keep a sample piece out and play with it every hour or so to see how it feels. Six hours for me was about perfect…

I laid the cardstock template over each one and carefully cut out each section with my scalpel. If you don’t use scalpels for cutting your decorations you don’t know what you’re missing!! They give you THE BEST cut!! SO clean and precise. I love the #11 blade…here’s what I buy on Amazon. One thing I figured out towards the end that this picture does not show is you should cut the smallest details first!! So, the little cuts on the trees and the holes in the tree trunks were MUCH easier to cut first than last. For instance in the picture above, by the time I cut the holes in the trees, there was only a small piece of gumpaste left and it kept wanting to move on me. So, cut the tiny pieces first!!! Also, if you don’t have one of these quilters rulers…they’ll change your life too because you can see under it to line things up!!! Here’s my fav!

Once I cut all the inside pieces out, I used a straight edge to cut the sides/top off to make the pages all exactly the same size.
I let the gumpaste pages dry for a week before assembling the book so they got nice and firm!!
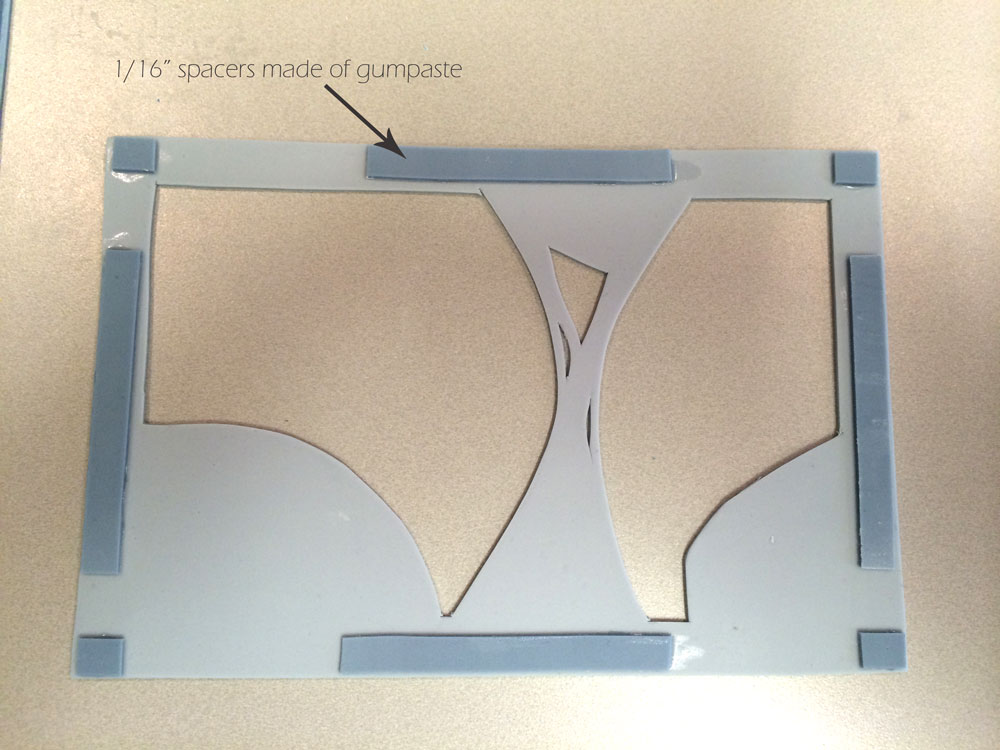
Once I was ready, I used my left over gumpaste (see the top gumpaste panel from the edge of the page) to cut spacers for between the books (do this ahead of time when you’re cutting out the pages so they don’t get rock hard). I cut them in 1/4″ strips. This gave me 1/16″ thick spacers for around the border of the pages. Hindsight is 20/20 and next time I would have made the spacers thicker. I like more shadowyness (I know it’s not a word, but I like it)…even if it looks slightly more like a shadow box. The additional dimension would have been nice. I “glued” the spacers on with a little sugar water (50/50 corn syrup and water mix).
Once I stacked all the pages together, I was ready to attach my front and back cover. But then I realized that I needed a panel of fake pages at the top and sides of the book (to hide the gumpaste pages and spacers), plus a little extra for the overhang of the book cover…equaling about 1/4″. If I added that thickness to the cover of the book, the top and right side of the cover would be wider than the bottom or the spine which would look weird. I wanted the scenery to be centered in the middle of the book cover. And THEN I realized, how was my wand wire going to slip down inside the book!!?? YIKES! My cover wasn’t big enough.
So, to solve the wire issue, I decided to take a drinking straw and glue it between two small strips of foam core so that the thickness of those pieces would be the thickness of the pages along the spine. This way, the wire would slide right down inside the straw and into the books below it. The only problem is I was adding 1/4″ of materials on the spine of the book…which was great because I needed 1/4″ there to match the top and side pages…but now my bottom would look funny and skinny. So, I decided to add 1/4″ spacer of foam core along the bottom of the book too…now there was 1/4″ of something all around the pages giving me a cover that would be the same thickness all the way around…I’m so sorry if that’s totally confusing…I didn’t take pics of this thought process because I was doing it all on the fly and figuring it out as I went!! LOL!!

So, once I glued all the pages together with a little sugar water and let it rest overnight, I attached the foam core/straw spine, the bottom foam core spacer and the side and top fake page panels. Then I added the front and back covers that I had allowed to overlap the top and right side. I then cut a tiny hole out of the fake page panel at the top so I had a place to slide my wire into.

Again…sorry that’s confusing…hopefully you’re catching what I’m throwing down!! LOL!!
As I said earlier…this was a very organic experience and kinda figured it all out as I went. The next book I make is going to be MUCH easier!! – and I’ll have better pictures!!! – if/when I do another one!!
OH, and in the back of the book, I cut a small hole out a little smaller than the tiny LED light I bought on Amazon. That way I could stick the light in the back, but also pull it out when I didn’t want it lit.

The hole was right behind the moon, so the moon panel page helped to hold the LED light and keep it from sliding into the book.

Oh, and one more thing…I painted the water and the moon with some super pearl luster dust and lemon extract so they would shimmer a bit. It gave it some nice dimension in there!!
SO fun!!

I hope you enjoyed following me along this crazy process as I made my first gumpaste altered book!!
Blessings!
Check out all my favorite tools HERE (including the scalpel & quilter’s ruler I used in this post)
Check out my online cake classes with Craftsy and snag some DEEP discounts HERE. This link also includes other class discounts so you don’t want to miss out!!
Speechless!
You gift is amazing. God bless you for sharing your skills.
you are an awesome inspiration.
Amazing!!!
AMAZING!
Amazing
I can’t even begin to thank you enough for posting this tutorial. I want to make a similar cake for my daughter’s birthday that’s coming up at the end of the month. You truly are a blessing. God bless you you are so generous and kind.
You are a true artist! This is not only so beautiful, but incredibly innovative. Thank you for sharing!
You are the best please i want to buy your books that i dont found in italy ,how to do? Please answer me on mrahali06@gmail.com thanks
I’m sorry I don’t have any books for sale. Just my online classes through Craftsy. You can find links to those classes in the sidebar. Blessings!!!
Wwwwwwoooooowwwwwwwww, so clever, just absolutely love love love this idea!
Hi Jessica, I attempted this technique and it’s very pretty, but I could not, for the life of me, figure out how to get the LED light in. Would you consider doing a paid tutorial on this technique? Maybe I didn’t leave enough room with the spacers, but there was no way this was going to fit with the dimensions I used. I would appreciate a paid tutorial from start to finish. I absolutely love your work!
I’ve seen these done with paper before, but never thought of it on a cake! Awesome!
Also, if you’re looking for more art to do it with, there’s a company called Geme near Portland that has Paper Tole Kits that are REALLY inexpensive (http://www.gemeart.com/). They do this same thing, with paper, in shadow boxes. But they have HUNDREDS of art to do it with. I may have to get a kit so I can do it in Gumpaste!
And a random question for you: would you do this with Modeling Chocolate? Or stick with the Gumpaste?
Very cool! I’ll have to look up that link. I would stick with gumpaste. The back and cover was actually modeling chocolate and it just didn’t have the stability I would have wanted. If I do it again, I’d make it all gumpaste. The thinner you roll modeling chocolate the less stability it has. It just wouldn’t hold up being so thin. You could also use pastillage too! Blessings!
wholly crap. I don’t even know what to say!! totally impressed….
LOL!! Thanks!
Ur amazing ‘n very talented.
Thank you!
I would pay for a tutorial of this, amazing work. I also love all the techniques on your craftsy class!
Thank you so much Stephanie! Blessings to you!